Where to Find and Connect Lovable Cloud and Supabase (September 2026 Update)
📌 Updated September 7, 2026: re-verified against the current editor. The project-level entry point is the stacked-layers icon in the top bar (its tooltip says More), which opens a menu where Cloud lives next to Analytics, AI, Agent integrations, Payments, Connectors, Security, SEO & AI search and Settings. The connect link is still at the bottom of the Cloud panel. Also since July 2026 Cloud has an official exit: Export project data, Pause Cloud and Remove Lovable Cloud live under Cloud > Overview > Advanced settings, full guide here: Leaving Lovable Cloud Is Finally Official (And It Might Make You Stay).
Connecting your own Supabase project to Lovable is totally doable. It is just split across two spots, so it is easy to miss one and feel stuck. Here is the full path, step by step, verified as of September 2026.
Heads-up: Lovable's interface moves around a lot lately, so I refresh this guide every so often. If something looks different on your screen, the wording of the links and buttons is your most reliable anchor.
Two backends, one quick distinction
Lovable gives you two backend options:
- Cloud: a managed backend Lovable runs for you, ready out of the box.
- Supabase: your own project, connected to Lovable.
Both are great, they just fit different moments. Connecting your own Supabase happens in two steps: first you enable Supabase and link your organization at the workspace level, then you connect it to a specific project. Linking the connector is the first half, picking the project is the second. Once you see both, it clicks.
The easiest moment: pick your database at the start
If you are starting a fresh build, the simplest path is to choose your backend before you prompt anything. On the home screen, click the + in the build box and open Databases.
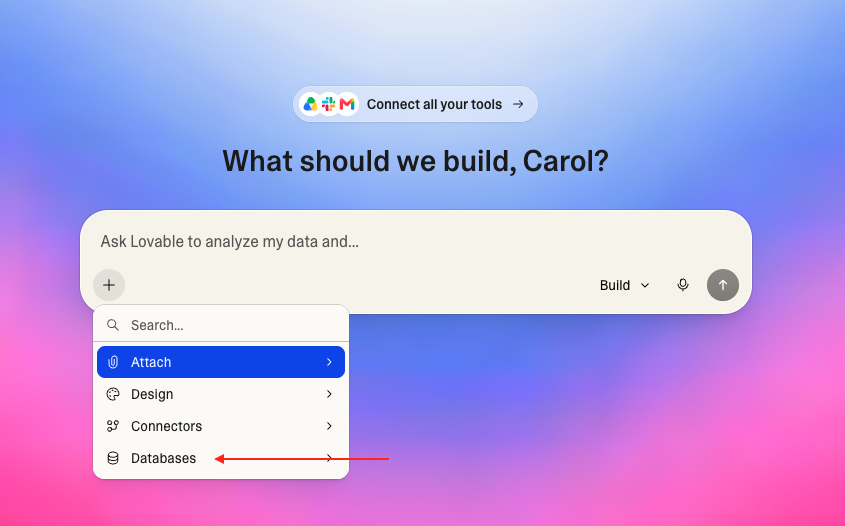
There you will see Lovable Cloud (it shows "auto-enabled in chat") and Supabase with your own organization listed right under it. Pick Supabase and your org, and your project starts already wired to your own database, no hunting through menus later.
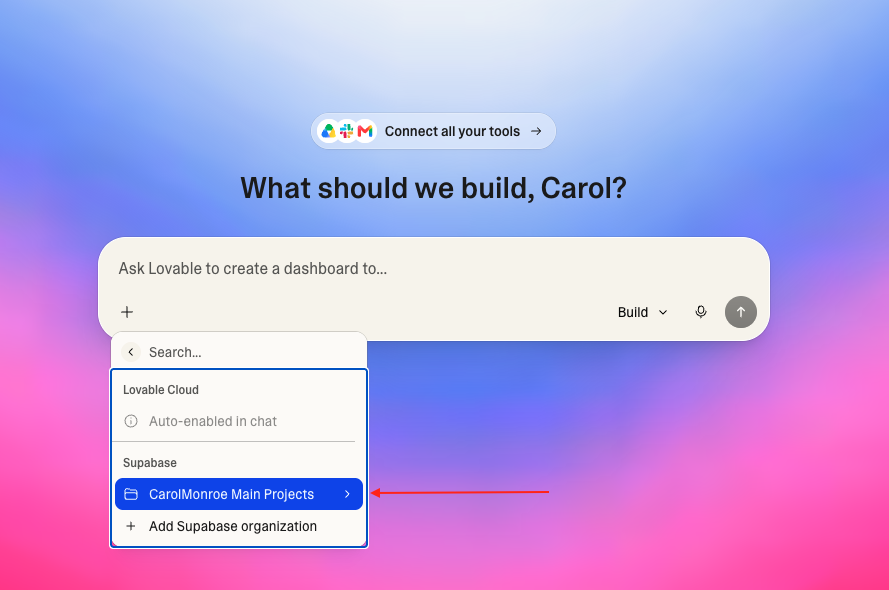
Already started a project? No worries, the steps below get you connected too.
Part 1: enable Supabase and link your org
1. Open Connectors from the sidebar (inside a project you can also reach it from the More menu in the top bar). This is where all your connectors live. Cloud and Supabase sit side by side, each with a short description.
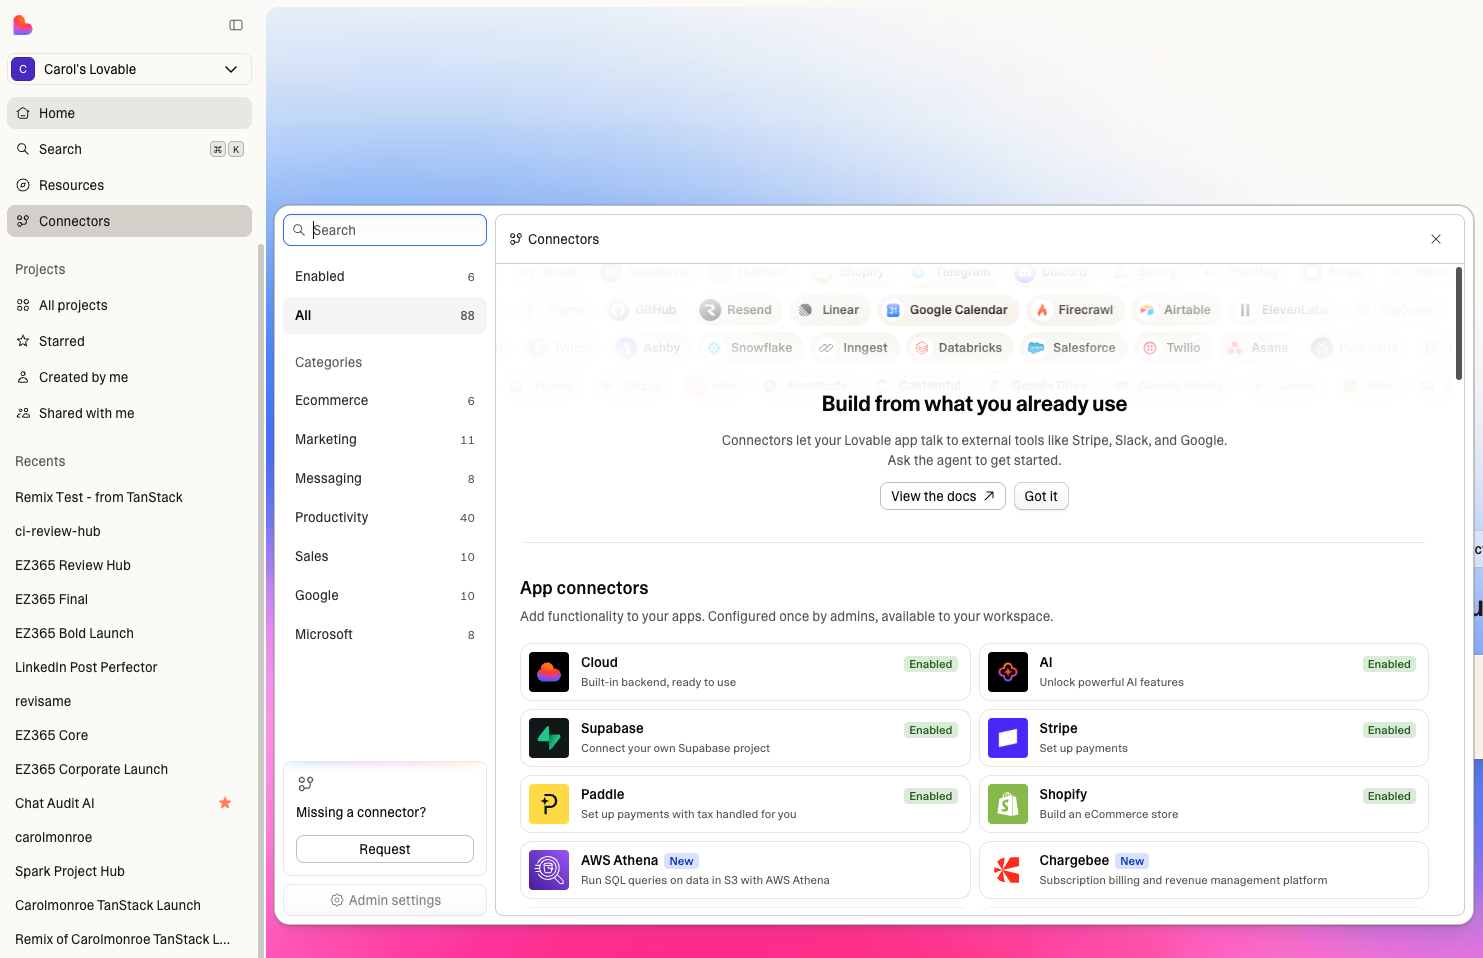
2. Open Supabase and make sure it is enabled. You will see what it brings to your app (database, file storage, real-time, edge functions) and a "Manage Connected Organizations" button.
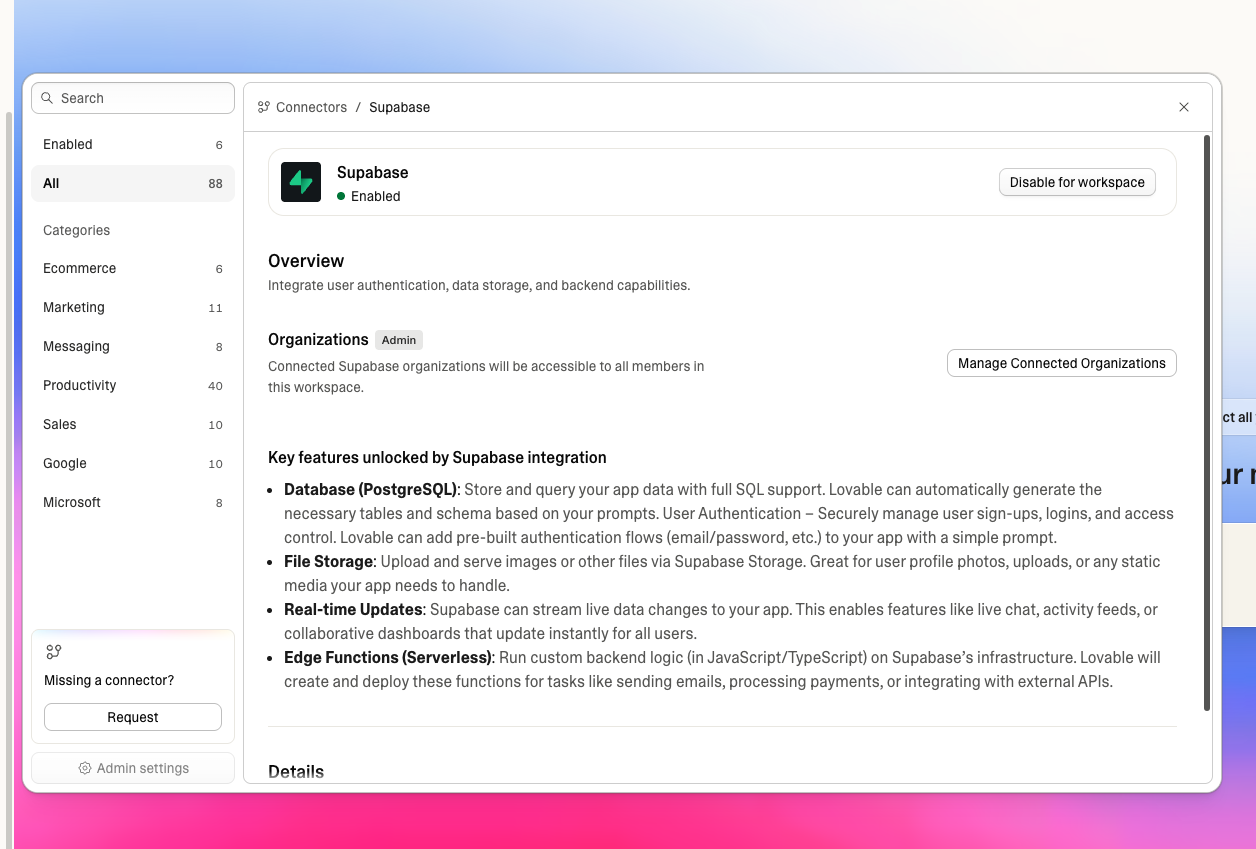
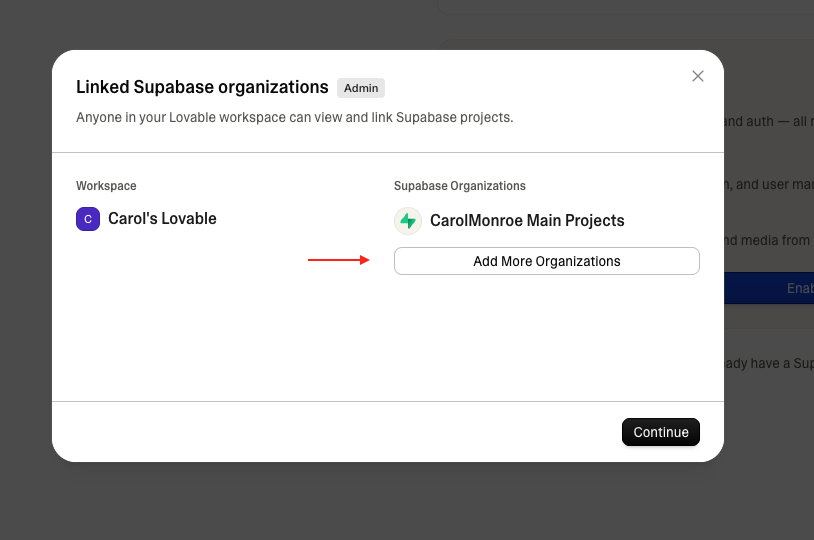
3. Link your Supabase organization to your workspace. If your org is not showing yet, click "Add More Organizations" to add it.
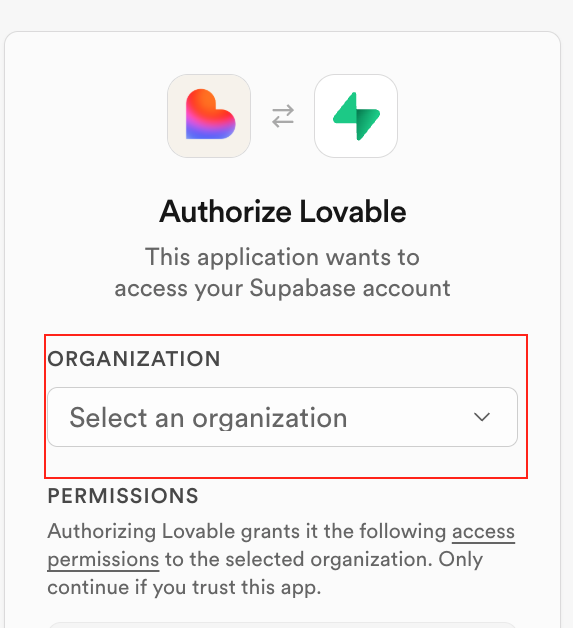
4. Authorize Lovable and pick your organization from the dropdown.
Part 2: connect it to your project
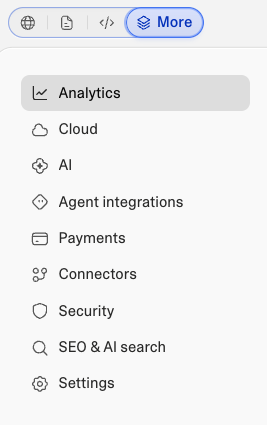
5. Open your project and click the stacked-layers icon at the right end of the top bar, next to Preview. Its tooltip says More, and it opens the project menu: Analytics, Cloud, AI, Agent integrations, Payments, Connectors, Security, SEO & AI search, Settings.
6. Pick Cloud. The panel opens on its Overview.
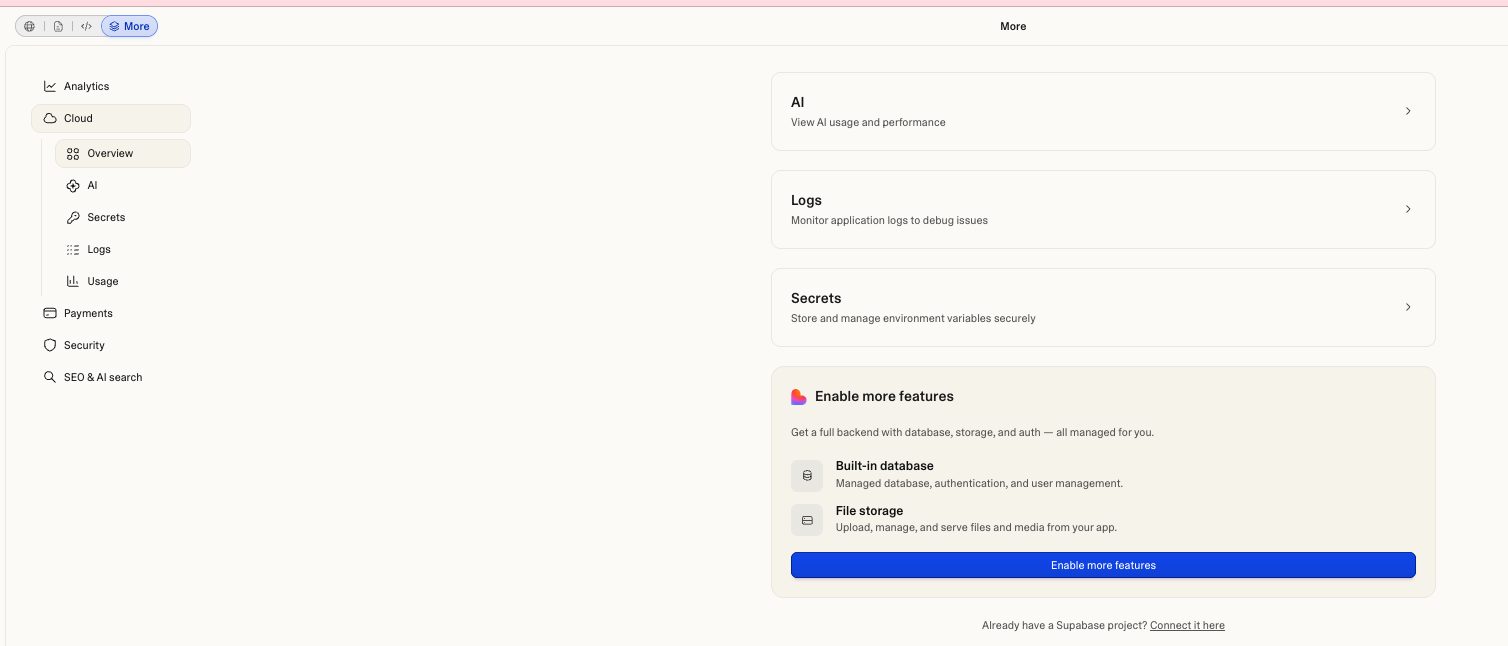
7. At the bottom of that panel, click "Already have a Supabase project? Connect it here". The blue "Enable more features" button up top is for Lovable Cloud, so skip that one if you want your own Supabase.
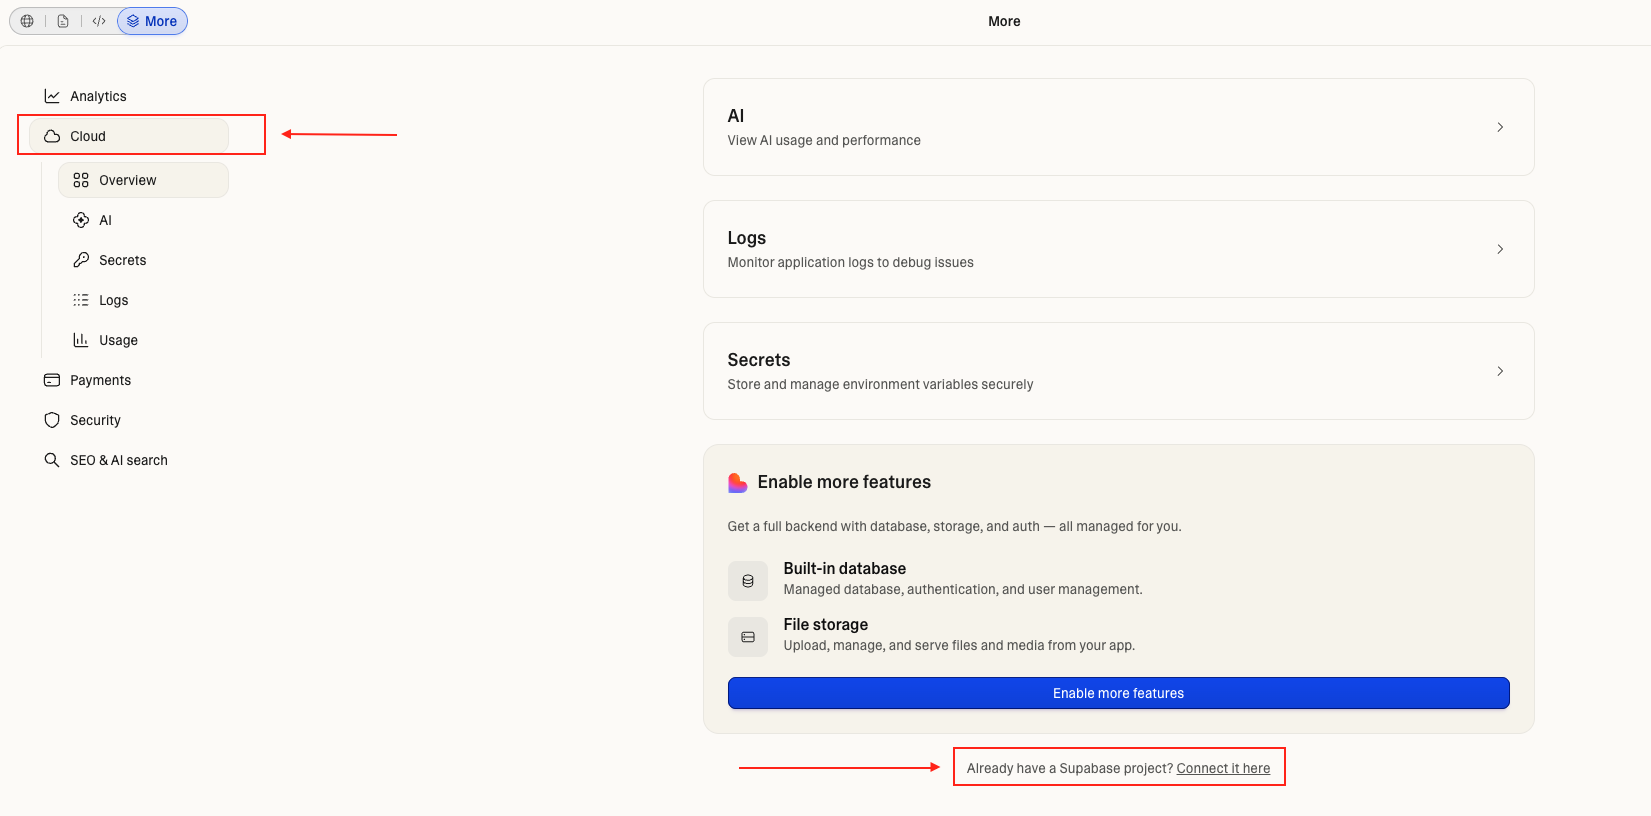
8. Pick your org, hit Continue, and Connect the specific project. That is it, your app is now wired to your own Supabase.
Prefer to use Lovable Cloud instead?
You can do that from the exact same panel. Instead of the connect link at the bottom, click the blue Enable more features button, and Lovable sets up a full backend for you (database, storage, auth) right there.
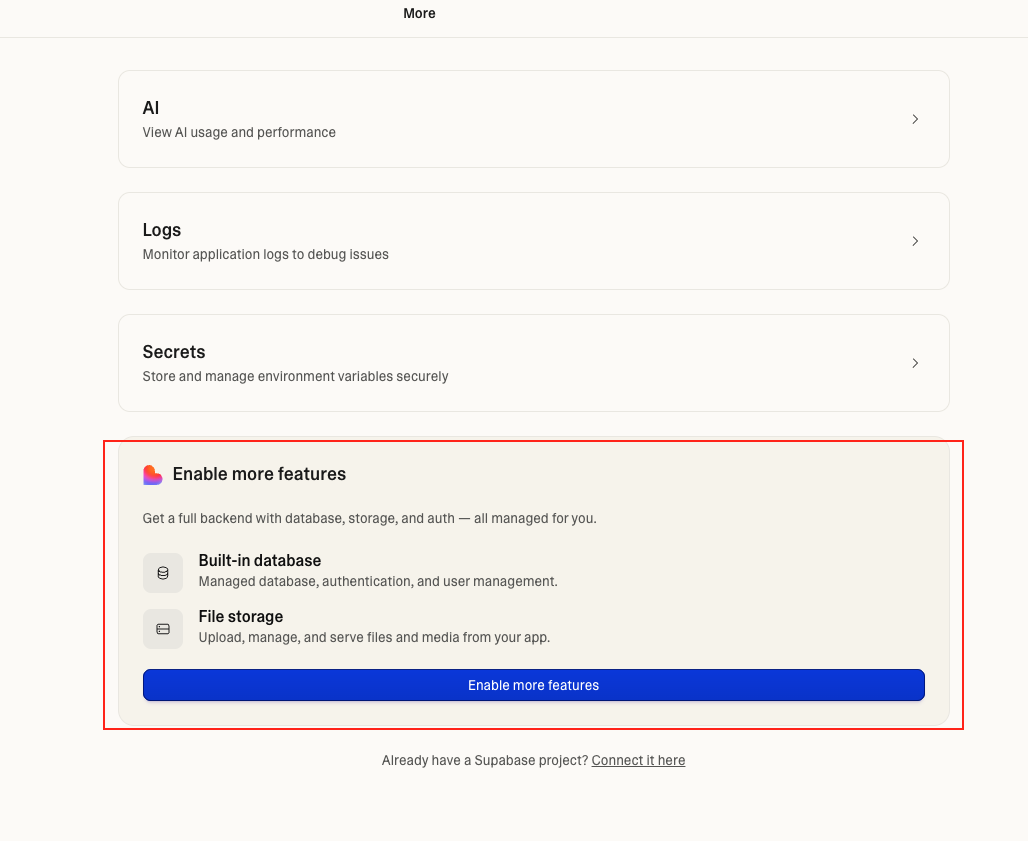
One thing worth pausing on: since July 2026 Cloud is no longer a one-way door, you can export your data, pause it or remove it yourself from Cloud > Overview > Advanced settings. But if you already have your own Supabase in mind, connecting it first still saves you the whole export and restore round trip.
And one habit that saves credits: connect from the UI, not from a prompt. Telling the agent "use supabase" is exactly what routes a project to Cloud.
Cloud or your own Supabase, how to choose
Supabase is a full platform with its own dashboard, outside of Lovable, where you manage your database, auth, and storage directly. Lovable Cloud is that same Supabase power, just built in and managed for you from inside Lovable. The two work almost the same under the hood.
Your own Supabase gives you a little more control and that separate dashboard. That is great if you want it, but if you are just starting out, a separate dashboard can feel a bit overwhelming, and Cloud keeps everything in one place. Neither is wrong, it just depends on where you are.
Quick recap
- Cloud is Lovable's managed backend, Supabase is your own. Two options, both solid.
- Fresh build? Pick your database from the home + menu, then Databases, before you prompt anything.
- Part 1 (workspace): Connectors, then Supabase, then enable and link your org.
- Part 2 (project): stacked-layers icon (More) in the top bar, then Cloud, then "Already have a Supabase project? Connect it here" at the bottom, then pick org and Connect project.
- Want Cloud instead? Same panel, click Enable more features. Since July 2026 you can export, pause or remove it later.
- Connect from the UI, not from a prompt, or the agent routes you to Cloud.
Hope this saves you some time. Happy building.
Reader margin
What stayed with you?
Leave one small mark in the margin.
Notes from readers
Stuck with something like this? I fix it daily → Services
This was a lifesaver... I was completely clueless to where to connect my supabase project from, can't belive I missed the text in the bottom 🤦♂️ Thank you!