Migrating from Lovable Cloud to Your Own Supabase
📌 Update (July 2026): Lovable Cloud now has an official exit! Export project data, Pause Cloud, and Remove Lovable Cloud all live under Cloud > Overview > Advanced settings. The guide below still works and remains useful for deep details, but there is a much easier official path now: Leaving Lovable Cloud Is Finally Official (And It Might Make You Stay).
📌 Update (July 2026): Two things changed since I wrote this. First, Lovable Cloud can now be removed officially: Cloud tab → Overview → Advanced settings → Export project data + Remove Lovable Cloud, then connect your own Supabase, no fresh project needed. Second, the Lovable MCP gives you direct SQL access to automate the entire migration - schema, data, auth users with passwords, storage, and edge functions. See the 2026 Migration Guide for the recommended approach. The steps below still work and are useful after removing Cloud.
First Things First
Lovable Cloud is a great option. Seriously. If you are just getting started, prototyping, or building something small, it works beautifully out of the box. No setup, no configuration, just build.
But at some point, you might feel like you have outgrown it. Maybe you need to run a quick SQL query and realize you cannot. Maybe you want to add Apple login and discover it is not supported. Maybe you just want more control over your backend.
That is when migrating to your own Supabase project makes sense.
What You Get With Your Own Supabase
Supabase is not just a database. When you migrate, you unlock:
- Full SQL access — run queries, debug data, create views, manage everything directly
- Any auth provider — Google, Apple, Discord, GitHub, enterprise SSO, magic links, phone auth
- Custom email templates — branded emails instead of generic ones
- Storage control — manage files, set policies, resize images on the fly
- Edge Functions — run server-side code without managing servers
- Realtime — live subscriptions for chat, notifications, collaborative features
- Multiple environments — staging, production, testing, all separate
- Logs and monitoring — see what is happening in real time
If any of this sounds useful, keep reading.
What You Will Need
Before we start, make sure you have these ready:
Accounts:
- A GitHub account (free at github.com)
- A Supabase account (free at supabase.com)
Tools:
- GitHub Desktop installed on your computer (download at desktop.github.com) — this lets you manage code without using the terminal
Your Lovable project:
- Already connected to GitHub (if not, go to Project Settings in Lovable and connect it first)
Overview: What We Are Going to Do
Here is the plan in simple terms:
- Step 1: Download your current code from GitHub to your computer
- Step 2: Create a new Supabase project where your data will live
- Step 3: Set up your database structure in Supabase
- Step 4: Create a fresh Lovable project and connect it to YOUR Supabase
- Step 5: Connect the new project to GitHub
- Step 6: Copy your code from the old project to the new one
- Step 7: Clone the new repository
- Step 8: Push and publish — done!
The whole process takes about 15-20 minutes. Let us go step by step.
Step 1: Download Your Current Code
First, we need to get your code onto your computer.
- Open GitHub Desktop
- Go to File → Clone Repository
- Find your Lovable project in the list (or paste the repository URL)
- Choose where to save it on your computer
- Click Clone
Now you have a local copy of all your code. We will use this later.
Step 2: Create Your Supabase Project
Time to set up your new backend.
- Go to supabase.com and log in
- You will see your dashboard — click the green New Project button
- Fill in the details:
- Name: Use something recognizable (like your app name)
- Database Password: Click "Generate" for a strong password and save it somewhere safe
- Region: Pick the one closest to where your users are
- Click Create new project
- Wait about 2 minutes for everything to set up
💡 Tip: Save your database password somewhere safe. You will need it if you ever want to connect directly to Postgres.
Now grab these two values (you will need them later):
- In the left sidebar, click Project Settings (the gear icon at the bottom)
- Click API in the settings menu
- Copy and save:
- Project URL — looks like
https://xxxxx.supabase.co - anon public key — a long string starting with
eyJ...
- Project URL — looks like
Keep these handy.
Step 3: Set Up Your Database Structure
Your Lovable project has SQL files that define your tables. We need to run these in Supabase.
Find your migration files:
- Open the folder where you cloned your project (Step 1)
- Navigate to
supabase/migrations - You will see files like
20240101000000_initial.sql
Run them in Supabase:
- In your Supabase dashboard, click SQL Editor in the left sidebar
- Click New query
- Open the first migration file in a text editor, copy everything
- Paste it into the SQL Editor and click Run
- Repeat for each migration file (in order by the timestamp in the filename)
⚠️ Important: Run migrations in order by their timestamp. Running them out of order can cause errors if tables depend on each other.
To verify it worked:
- Click Table Editor in the left sidebar
- You should see your tables listed there
Step 4: Create a New Lovable Project
Now we create a fresh Lovable project and connect it to YOUR Supabase.
- Go to lovable.dev
- Create a new project with this prompt:
Create a blank project with no features, just the basic setup.
- Lovable will generate a basic project. The chat might open in fullscreen — if so, click the minimize icon in the top-right corner to see the full interface.
Now connect your Supabase (this is the important part):
- In the top toolbar, click the Cloud button
- A modal appears showing Lovable Cloud — do not click "Enable Cloud"
- Look at the bottom: click "Already have a Supabase project? Connect it here"
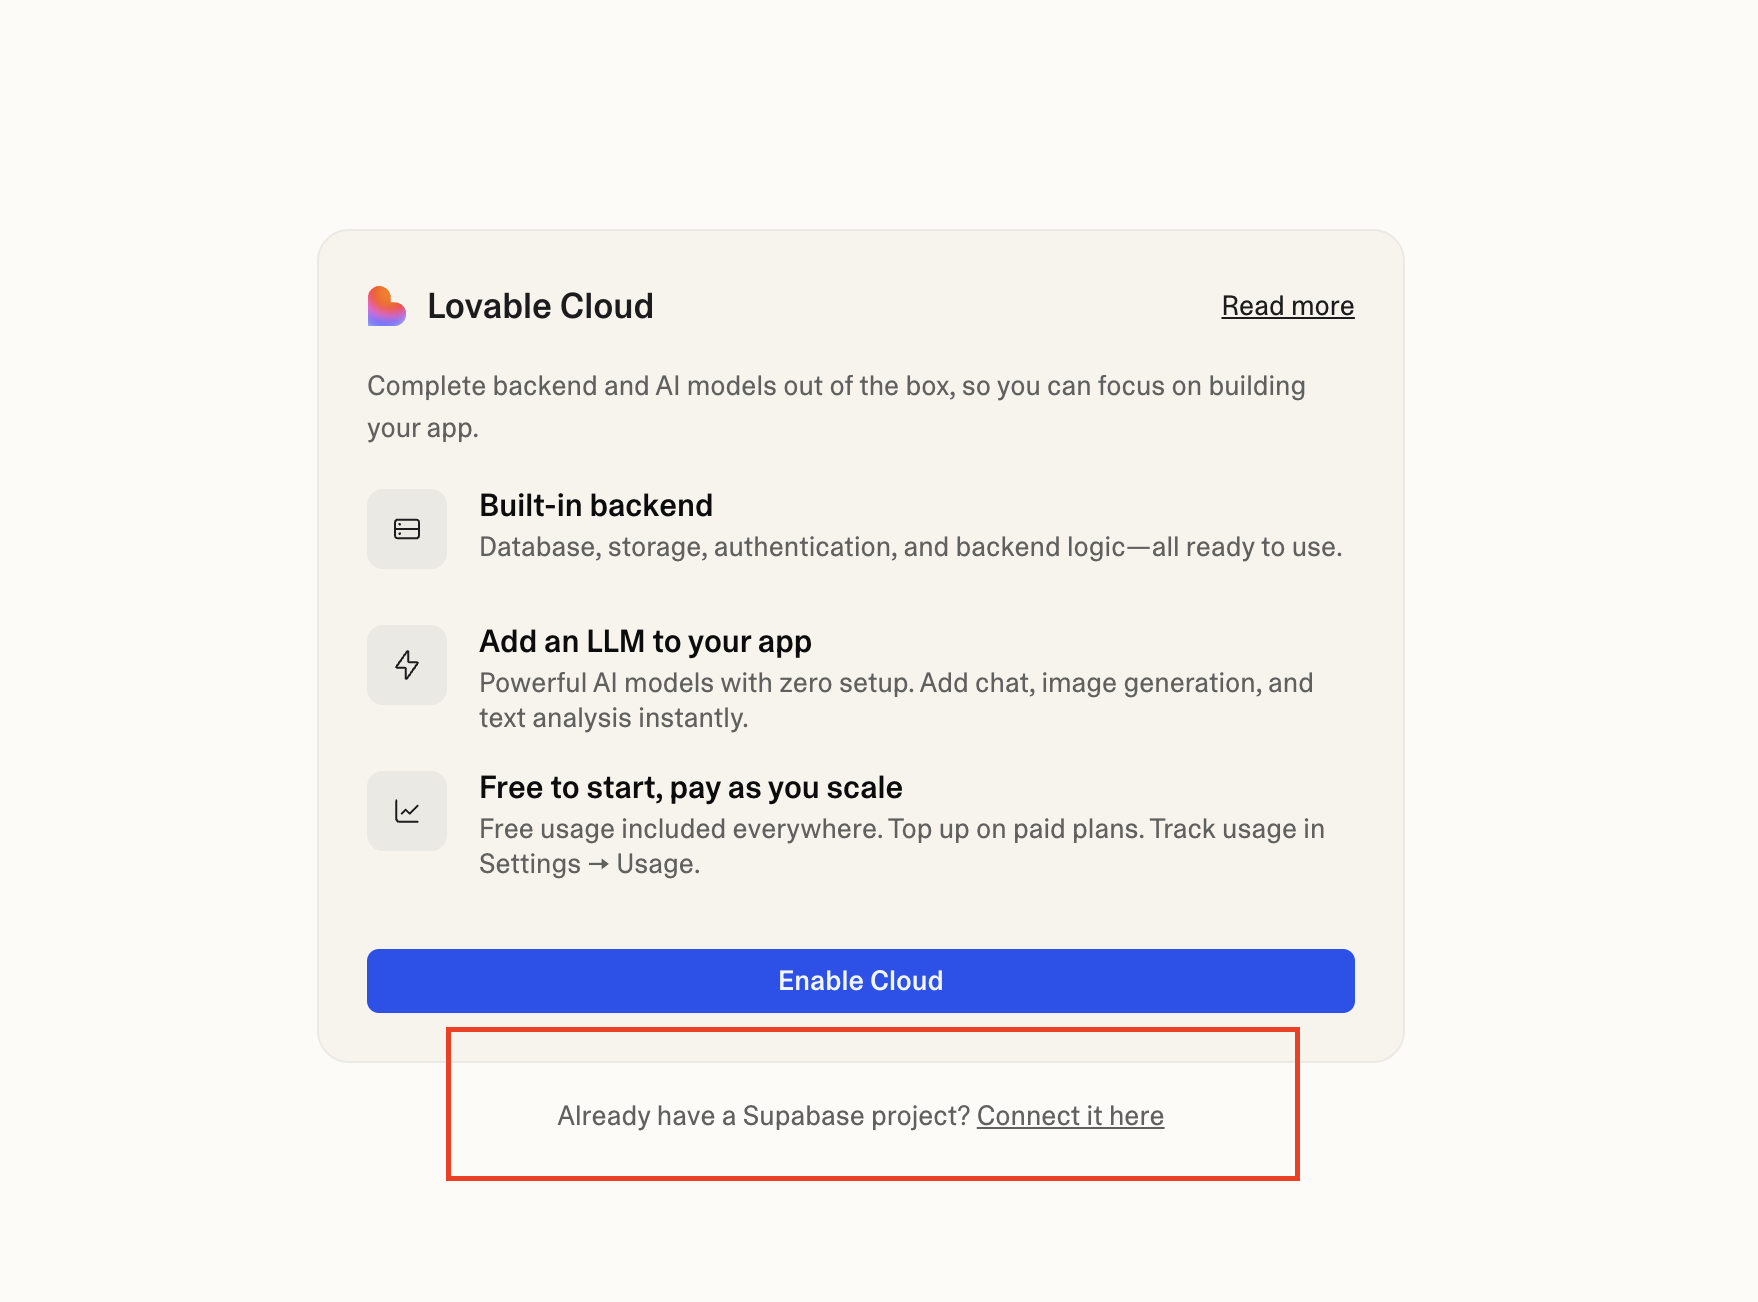
- Follow the prompts to authorize and select your Supabase project
⚠️ Important: If you accidentally click "Enable Cloud", you can now remove it again from Cloud → Overview → Advanced settings (this changed in July 2026). Still, save yourself the round trip and click carefully here.
Step 5: Connect to GitHub
Your new Lovable project needs its own repository.
- In Lovable, go to Project Settings (or click the settings icon)
- Find the GitHub section
- Click Connect to GitHub
- Create a new repository (do not use your old one)
- Name it something like
my-app-v2or similar
Step 6: Clone the New Repository
Back to GitHub Desktop:
- Go to File → Clone Repository
- Find your new repository (the one you just created)
- Clone it to a different folder than your old project
- You now have two folders: old project and new (empty) project
Step 7: Copy Your Code
This is where everything comes together.
- Open both folders in your file explorer
- Select all files from your old project folder
- Copy them into your new project folder (replace any existing files)
You have just transplanted your entire app into the new setup.
Step 8: Push and Publish
In GitHub Desktop:
- Select your new repository
- You will see all the copied files listed as changes
- Write a commit message like "Initial migration from Lovable Cloud"
- Click Commit to main
- Click Push origin
In Lovable:
- Your project should detect the new code from GitHub
- Click Publish or ask Lovable to deploy
💡 Tip: If you see a blank screen, just tell Lovable "trigger a hot reload" or make any tiny edit. This forces a rebuild.
Congratulations — you have migrated!
If You Have Existing Data
If your Lovable Cloud project has users, content, or files you need to keep, here are the extra steps.
Moving Your Data
- In Lovable, go to Cloud → Database
- For each table, click Export CSV to download your data
- In Supabase, go to Table Editor (left sidebar)
- Select a table, click Insert → Import data from CSV
- Upload the matching file
- Repeat for all tables
💡 Tip: Import in the right order — users and profiles first, then tables that reference them.
Moving Your Files
If your app stores images or documents:
- In Supabase, click Storage in the left sidebar
- Your buckets should exist from the migration
- Download all files from Lovable storage
- Upload them to the matching buckets in Supabase
Moving Your Users
📌 Update (July 2026): You can now export users WITH their original passwords. Full walkthrough: How to migrate users from Lovable Cloud (with passwords). The options below are the fallback if you prefer the manual route.
Option A — Send password reset emails:
- In Supabase, go to Authentication (left sidebar)
- Click Add user → Send invitation
- Users receive an email to set a new password
Option B — Create users with temporary passwords:
- In Supabase Authentication, click Add user → Create user
- Set a temporary password and share it with them
Either way, remember that Supabase creates new User IDs. Update any tables that reference the old IDs.
Common Questions
Q: I see a blank screen after publishing. What do I do?
Tell Lovable to "trigger a hot reload" or make any small edit to force a rebuild. This usually fixes it.
Q: Lovable keeps resetting my Supabase credentials. Why?
Known issue. When you edit in Lovable, it sometimes reverts your .env file to Lovable Cloud settings. Always double-check after changes. Working locally in VS Code or Cursor avoids this.
Q: I am getting OAuth errors after migration.
Try disconnecting and reconnecting:
- In Supabase: go to Organization Settings → OAuth Apps and remove Lovable
- In Lovable: disconnect Supabase
- Reconnect with correct permissions
Q: Can I use Lovable Cloud AND my own Supabase?
No — each project connects to one backend. You have to choose.
Q: Is there an easier way if I just want my own hosting?
Yes! The "branch method": keep your project on GitHub, create a new branch, and host that branch on Cloudflare Pages or Vercel. You keep Lovable as your editor but control your own deployment.
Community Resources
This guide builds on the community's collective experience:
Official Documentation
Want Help Along the Way?
Copy this prompt and paste it into ChatGPT, Claude, or your favorite AI assistant. It will guide you through each step interactively:
I need help migrating my Lovable project from Lovable Cloud to my own Supabase project. Guide me through this process step by step, waiting for my confirmation before moving to the next step.

Here is what I need to do:
1. Clone my current Lovable project from GitHub to my computer using GitHub Desktop
2. Create a new Supabase project at supabase.com and save the Project URL and anon key
3. Find my migration files in supabase/migrations and run them in the Supabase SQL Editor
4. Create a new blank Lovable project and connect it to MY Supabase (not Lovable Cloud) by clicking "Already have a Supabase project? Connect it here"
5. Connect this new Lovable project to a NEW GitHub repository
6. Clone the new repository to my computer
7. Copy all files from my old project folder to the new project folder
8. Commit and push the changes using GitHub Desktop
9. Publish in Lovable

Additional context:
- I am using GitHub Desktop (not terminal)
- I need specific instructions on where to find things in Supabase (which sidebar options, which buttons)
- If I have existing data, I will also need to export CSVs from Lovable Cloud and import them into Supabase
- Warn me before any step that could lock me into Lovable Cloud

Start by asking me if I have GitHub Desktop and a Supabase account ready, then guide me through step 1.
You Did It
Migrating feels like a lot, but once you are on your own Supabase, you will have full control. Better debugging, more auth options, real monitoring, and no more limitations.
And remember — Lovable Cloud is still great for quick prototypes. Now you know how to graduate when you are ready.
Related skill: Lovable Cloud Migration — give this to your AI agent for the full migration workflow.
Reader margin
What stayed with you?
Leave one small mark in the margin.
Notes from readers
Stuck with something like this? I fix it daily → Services
Hi Carol, thanks for the guide! One improvement for step 3: instead of manually pasting and running all migration sql commands, you can concatenate all of them in a single file, and then just paste one big file in supabase to recreate everything. I used this command but should be easy to generate one as well `for f in supabase/migrations/*.sql; do cat "$f"; echo ""; done > supa_migrations_all.sql`
We created lovebase.dev - please give it a try and let me know your thoughts!